cPanel BackUp Options
There are a few different backup options from inside your cPanel account. This article briefly explains each to help you familiarize yourself with the backup options available.
Backup and Backup Wizard

Inside your cPanel account underneath the Files section you will see two icons. Backup and Backup Wizard.
Backup > Full Website Backup
First, let's click on the Backup icon.  Here you will see an option to Download a Full Website backup. This is actually a backup of your entire cPanel account. This is not something that you can restore, but it is something that your webhost can generally restore for you if they are running on a WHM/cPanel environment.
cPanel documentation: https://documentation.cpanel.net/display/74Docs/Backup+for+cPanel

Click Here for the Download a Full Website Backup Article
Q: When would you want to use this option?
A: Use this option to protect against data loss if something goes wrong with your host. You can also take this to other hosting providers (on WHM and cPanel environments) who can generally use it to re-create your entire cPanel account on their hosting platform.
Scroll down the page and you will see a drop down menu underneath Account Backups.

If you have ever clicked on the Download a Full Website Backup button in cPanel, the backup will show up in this list. You can select it and download it to your local machine here. (The actual location of the backup file is in your Home Directory in File manager.)
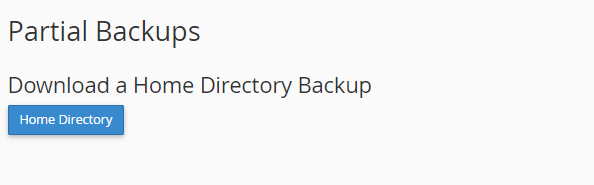
Backup > Partial Backups: "Home Directory"
Let's move on to Partial Backups. Click the Home Directory button. This will download a copy of all of your files located in your Home Directory inside of File Manager to your computer in a compressed tar.gz file. The Home Directory is basically everything inside of File manager.
Backup > Partial Backups: "Download a MySQL Database Backup"
Let's move on to Download a MySQL Database Backup section of the Partial Backups. Here you will a see a table with a list of all of your current database. These are backups you can restore from the Backup > Partial Backup section of cPanel. For more on what a Database is Please Click here to review the MySQL Database Article.

Clicking on one of the databases in the list will download a '.sql ' file corresponding with the name of the database onto your local machine. So for example, if you clicked on glowfroghosting_db1, the file you download will look something like: glowfroghosting_db1.sql
This is a backup of the entire database that can be easily restored in the next section we are about to cover. Keep these in a safe place on your computer in case one of your databases become corrupted.
Brainfood: Most websites built upon WordPress or any other popular Content Management Systems or CMS continuously write to the database. If something goes wrong, similar to when your computer is running updates and you get the message "Please do not restart or power off the machine", this can lead to data corruption. Most websites rely on the data in the database so this is never fun when this happens and although it's rare that it happens, it isn't unsual and is just an unfortunate part of database management. But luckily, if you are following GlowFrog Hosting's Good BackUp Practices, you have a backup!
Restoring a Partial Backup
Backup > Partial Backups: "Restore a Home Directory Backup"
Remember the Home Directory Backup we made earlier? If not, it looks like this:
Again, this is a backup of all of the files in your home directory which is basically all of your files inside of File manager. You can restore this backup in this section. Click on "Browse" underneath the Restore a Home Directory Backup section.

A browsing window will pop open. Locate the file you downloaded earlier (when you clicked 'Home Directory' in the Download a Home Directory Backup option) and double click the file. The file name will then be displayed underneath Restore a Home Directory Backup. Click Upload to restore your files.
Hint: it usually looks something like this: backup-glowfroghosting.com-9-15-2018.tar.gz where glowfroghosting.com will instead be your domain name.

That's it! You've successfully restored all of your files in the Home directory in File Manager. Check your site(s) to ensure everything looks good and you are all set. Good job!
Backup > Partial Backups: "Restore MySQL Database Backup"
Let's move on to restoring a MySQL database backup. Remember the database backup we downloaded earlier? If not, it looks like this:
Again, this is a backup of all of the databases your websites use to store your websites important data. You can restore this backup in this section. Click on "Browse" underneath the Restore a MySQL Database Backup section.
A browsing window will pop open. Locate the file you downloaded earlier (when you clicked on one of your databases in the Download a MySQL Backup option) and double click the file. The file name will then be displayed underneath Restore a MySQL Backup section. Click Upload to upload your backup file and restore your database.
Hint: it usually looks something like this: glowfroghosting_db1.sql where glowfroghosting will instead be your domain or custom database name.

That's it! You've successfully restored your database. Check your site(s) to ensure everything looks good and you are all set. Good job!
Backup > Partial Backups: "Download Email Forwarders"
You can also download backups of your email forwarders and filters. Click on the domain in the list that you want to download all of the email forwarders for. If you have set up email forwarding by clicking on 'Forwarders' ![]() icon in the Email section of cPanel, this is where you can download a backup of your current forwarders. If you have multiple forwarders set up, this makes restoring them quicker than adding them back one by one.
icon in the Email section of cPanel, this is where you can download a backup of your current forwarders. If you have multiple forwarders set up, this makes restoring them quicker than adding them back one by one.
Click on the domain you want to download the backup of your Forwarders for and a window will pop up allowing you to select a location to save the file on your local machine.

To restore your email forwarders, click on 'Browse' underneath the 'Restore Email Forwarders Section' and a window will pop up allowing you to locate the backup file of your email forwarders. Click on the file then click open. You should then see the file displayed underneath the "Restore Email Forwarders" section. Click the blue "Upload" button to restore the backup file. That's it!
Remember to check the Forwarders ![]() section in cPanel to ensure your forwarders are there and have been restored.
section in cPanel to ensure your forwarders are there and have been restored.

You can follow the same steps to restore your Email Filters.
Happy Backing Up with GlowFrog Hosting! Remember to follow GlowFrog Hosting's Good Backup Practices for the best Web Hosting Experience.
The cPanel Knowledgebase is full of helpful articles related to cPanel. Here is the link: https://documentation.cpanel.net/display/CKB/cPanel+Knowledge+Base
You can also seek additional Support for cPanel related issues and tasks via the cPanel Support Forums. Here is the link: https://forums.cpanel.net/
If you need help with restoring or creating a backup please feel free to contact our Support Team support@glowfroghosting.com or submit a Support Ticket.
