First: Find the IP Address Associated with Your Account
- Log into cPanel
- In the Top Right Hand Corner of cPanel, click on Server Information
- Scroll down to where you see “Shared IP address”. If you have a dedicated IP, it will say “Dedicated IP” instead.
- Copy the IP address!
- Open Notepad as an Administrator:
- Locate Notepad within your Start menu. Right-click on "Notepad" and select “Run as administrator”.

-
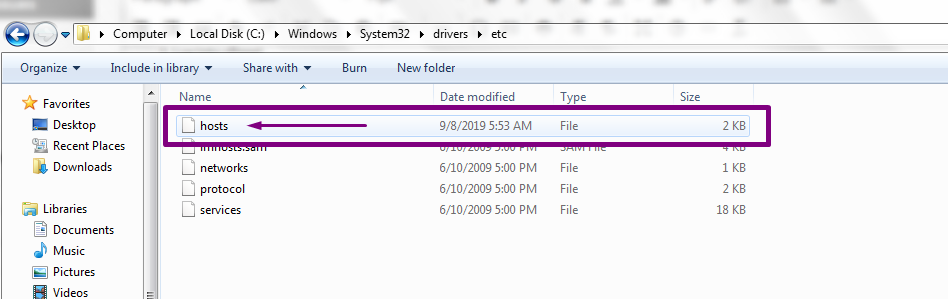
Locate Your hosts File
It's generally in this location c:\windows\system32\drivers\etc and the filename is: hosts. If you do not see it there, see below:
- Windows 95/98/Me c:\windows
- Windows NT/2000/XP Pro c:\winnt\system32\drivers\etc
- Windows XP Home/Vista/Windows 7 c:\windows\system32\drivers\etc
- Windows 8 c:\windows\system32\drivers\etc
- Windows 10 c:\windows\system32\drivers\etc
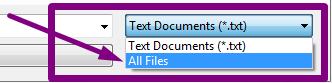
7. From Notepad, click "File" then "Open"
- Change the Drop Down type above where it says open to "All Files"
8. Navigate to your hosts file, select it, and click "open"

9. Edit Your hosts File
Now it's time to edit the file. It should look similar to the example below by default:
# Copyright (c) 1993-1999 Microsoft Corp.
# This is a sample HOSTS file used by Microsoft TCP/IP for Windows.
# This file contains the mappings of IP addresses to host names.
# Each entry should be kept on an individual line.
# The IP address should be placed in the first column followed by the corresponding host name.
# The IP address and the host name should be separated by at least one space.
# Additionally, comments (such as these) may be inserted on individual lines
# or following the machine name denoted by a '#' symbol.
# For example:
# 102.54.94.97 rhino.acme.com # source server
# 38.25.63.10 x.acme.com # x client host

127.0.0.1 localhost
10. On a new line directly underneath the last entry, paste your IP address and your domain name as in our example below: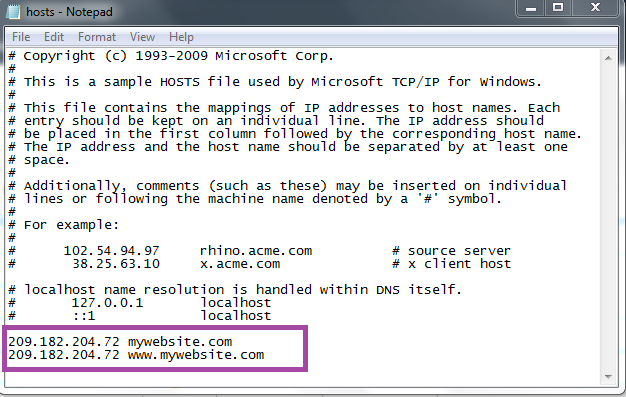
11. Click File, then save.
That's it! Check to see if it worked by opening your browser, then typing your website name in the address bar. You should now be able to browse to the website as if it were online.
This also works if you want to view how your website looks on another server other than where it is currently hosted or pointed to.
NOTE: This change is only visible to you since it was made on your computer. It will not affect anyone else's ability to view your site.
