How to Install WordPress Plugins

Install WordPress Plugins from the Dashboard

Installing Plugins for WordPress from the WordPress Dashboard is a hitch:
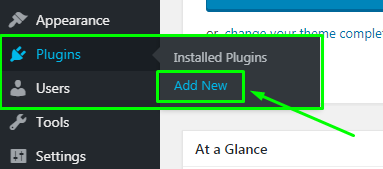
1. Log into WordPress

WordPress Plugin Add New

2. On the left-hand side of the Dashboard, hover over 'Plugins' and click 'Add New'

3. Use the search feature and type in the 'Name of the Plugin' or 'keyword' for the type of plugin you wish to install.

In this example, we are searching for the 'NGINX Helper Plugin'.
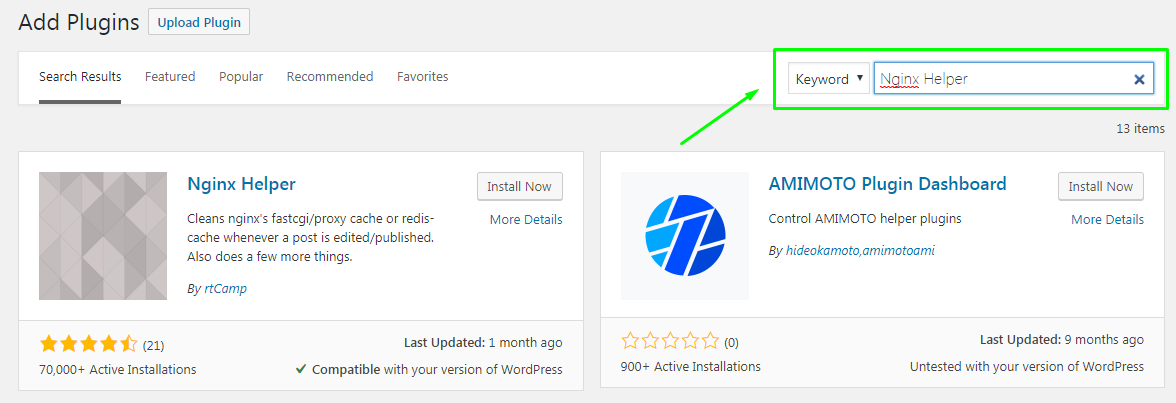
WordPress Plugins Search

4. Locate the plugin you wish to install and click 'Install Now'.
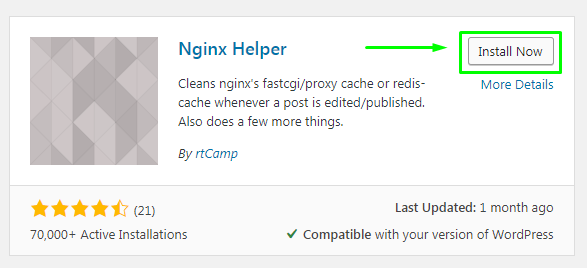
 

WordPress Plugins Install Now

The 'Install Now' icon will change to indicate the plugin is being installed.

WordPress Plugins Action Installing

5. Click on 'Activate' to activate the installed plugin.
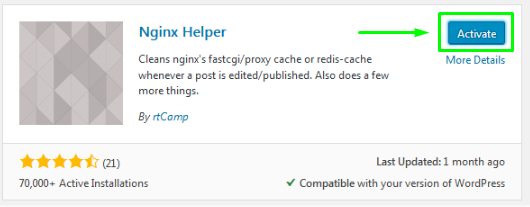
WordPress Plugins Activate

 That's it! Head on over to the plugin settings to configure your new plugin.

Need Help? Submit a Ticket or Emailsupport@glowfroghosting.com

  • 4 Users Found This Useful
Was this answer helpful?

Related Articles

Change/Reset cPanel Password via FrogDen

  Option #1 - Update cPanel Password from within Frog Den Updating your cPanel password...

How to Upload Files via File Manager

Upload Files via File Manager in cPanel You can Upload your Files for Your Website Using File...

Enable FreeSSL

Enable Free/Auto SSL Enabling your FreeSSL is easy: Log into cPanel Once logged in Scroll...

Add New Domain to cPanel

Add an Addon Domain from cPanel Login to cPanel Click “Addon Domain” under the “Domains”...

Where do I put my files? Locate Document Root

Find the Document Root of your Website The document root of your website is defined as the...